Provider – Facebook

1. Create a Facebook App
To be able to log in via Facebook you must create a Facebook app first.
- 1. Navigate to https://developers.facebook.com/apps/
- 2. Log in with your Facebook credentials if you are not logged in.
- 3. Click on the “Create App” button and then choose the “Allow people to log in with their Facebook account” option as use case and press “Next”!
- 4. Fill the “Add an app name” and “App contact email” fields. The specified app name will appear on your Consent Screen!
- 5. Optional: choose a “Business Manager Account” if you would like to. If you didn’t choose a “Business Manager Account” at this point, you will need to select it in step 19, before you start the “Verification”!
- 6. Click the “Create App” button and complete the Security Check.
- 7. Request email address from the users:
- Click on the “Use cases” tab on the left side and then click on the “Edit” button that appears next to the “Authentication and account creation” item.
- Find the “email” permission and click the “Add” button.
- Press the “Go back” button on the top right corner, so you can return to the previous page.
- 8. Click on the “Products” tab on the left side and then click on the “Configure” button that appears next to the “Facebook Login” product, then choose “Settings”.
- 9. Into the “Valid OAuth redirect URIs” field you should add the URL that W3 Social Login suggests.
- 10. Press the “Save changes” button.
- 11. On the left side, click on the “Settings” tab, then click “Basic”.
- 12. Enter your domain name to the “App Domains” field.
- 13. Fill up the “Privacy Policy URL” field. Provide a publicly available and easily accessible privacy policy that explains what data you are collecting and how you will use that data.
- 14. At “User Data Deletion”, choose the “Data Deletion Instructions URL” option, and enter the URL of your page* with the instructions on how users can delete their accounts on your site.
To comply with GDPR, you should already offer possibility to delete accounts on your site, either by the user or by the admin:- If each user has an option to delete the account: the URL should point to a guide showing the way users can delete their accounts.
- If the accounts are deleted by an admin: then you should have a section – usually in the Privacy Policy – with the contact details, where users can send their account erasure requests. In this case the URL should point to this section of the document.
- 15. Select a “Category”, an “App Icon”.
- 16. Scroll down to the bottom of the page, press the “+ Add platform” button.
- 17. Select “Website” platform, then press “Next” and into the “Website > Site URL” field you should enter the value that W3 Social Login suggests in the Getting Started guide within the plugin.
- 18. Press the “Save changes” button.
- 19. By default, your application only has Standard Access for the “public_profile” and “email” permissions, which means that only you can log in with it. To get Advanced Access you will need to go trough the Business Verification, that you can start on the “Verification” tab on the left side.
- 20. Currently your app is in Development Mode which also means that people outside of your business can not use it. Once your verification is completed, click on the “Go live” tab and publish your app by clicking on the “Go live” button at the bottom right corner. Before you press it, it is recommended to check the steps listed on the “Go live” page, if you configured everything properly.
- 21. After everything is done, click on the “Settings” tab, then click “Basic”.
- 22. At the top of the page you can find your “App ID” and you can see your “App secret” if you click on the Show button. These will be needed in plugin’s settings.
2. App setup
Once your Facebook app is ready you’ll need to copy and paste the App ID and App secret to the Facebook provider’s Settings tab. You can find the information at your Facebook app’s Settings which you can reach from the left sidebar.
3. Verifying
Once your App ID and App secret has been added you need to verify the setup first. This verification helps you identify possible problems with the app.
Settings

App ID
The App ID of your Facebook app. You can find it at your App → left menu: Settings.
App Secret
The App Secret of your Facebook app. You can find it at your App → left menu: Settings.

Username prefix on Register
Whenever a new user registers with their Facebook account they can get a custom prefix so you can easily identify them.
Fallback username prefix on register
Whenever a new user registers with their Facebook account and we can not generate a valid username from the first name or last name, a random username will be generated. With this option they can get a custom prefix so you can easily identify them.Terms and conditions
Sync data
By default W3 Social Login stores the first name, last name, email, avatar url and access token if it is possible, however some additional information can also be retrieved and stored.
When an option is checked, that field will be stored in a meta key with the specified name. The fields are stored in the wp_user_meta table.
NOTE: To use these fields, your app needs an App Review by Facebook, as of Facebook updated their App Review process and API permissions model. More information can be found on the Facebook App Review page.

Sync fields
It determines when the synchronization shall happen.
- Register: whenever a new user registers with a provider, their data will be retrieved and stored.
- Login: whenever user logs in with a provider, their data will be retrieved and stored.
- Link: whenever user links and existing WordPress account with a provider, their data will be retrieved and stored.
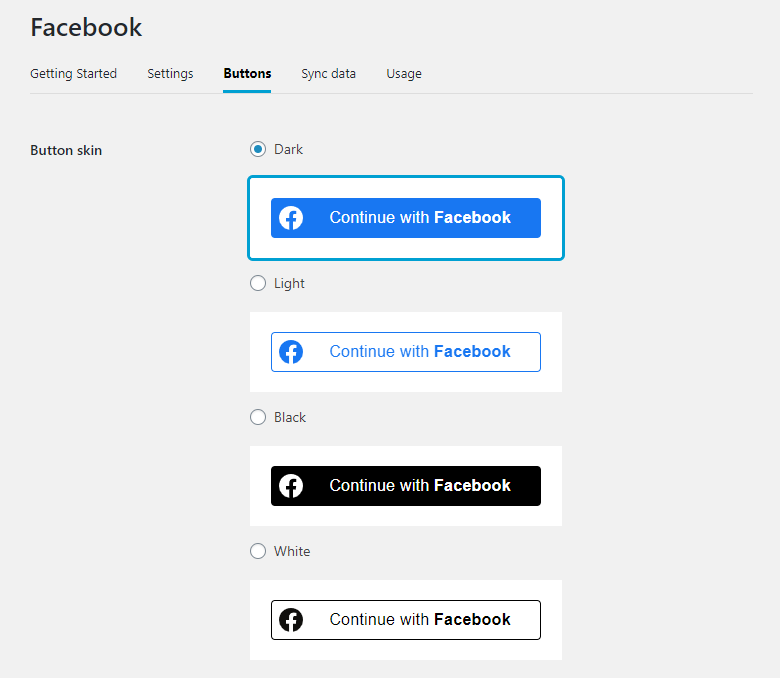
Facebook User Experience Design compatibility
According to the User Experience Design, the button need to comply with some requirements. At the buttons tab of the Facebook provider there are predefined skins, which comply with those requirements.


