WPML Setup
The WPML plugin will help you to translate your website to different languages. Follow the steps described in this article to set up the plugin.
Activate the WPML plugin. Follow Dashboard > Plugins and click Activate under the WPML items.
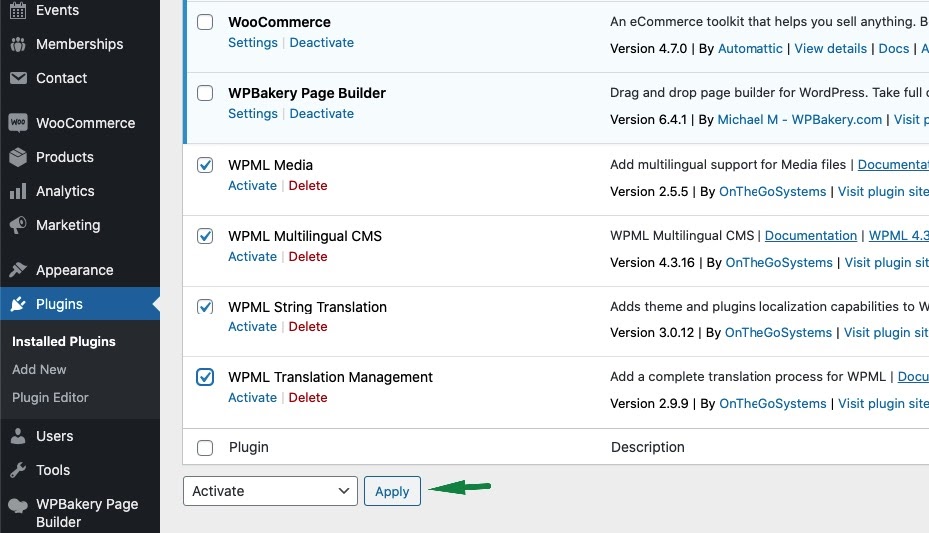
After that click on Configure WPML to finish the plugin installation.
To manage languages, go to WPML > Languages.
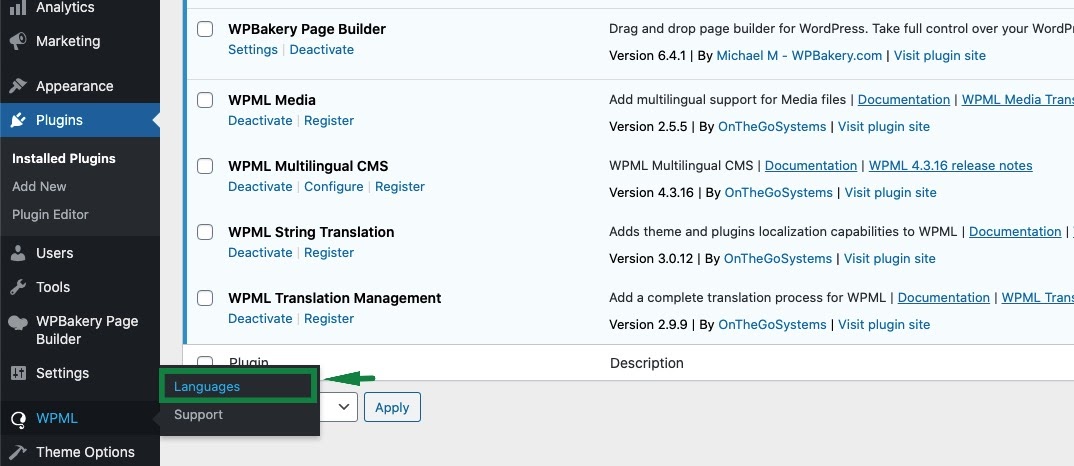
The languages section allows you to make a WordPress site multilingual.
When you configure WPML for the first time, you need to choose the language of existing content. Select the language of your current website content in the Current Content Language section.

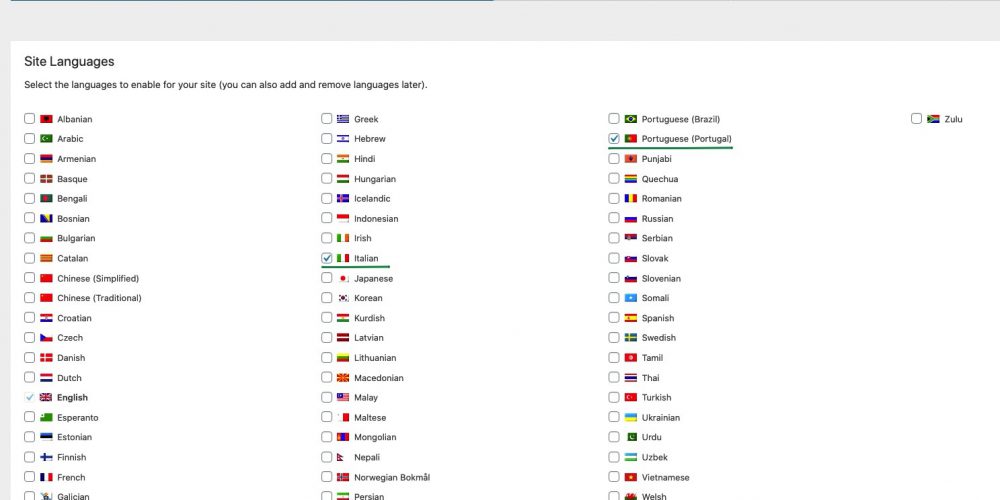
In the next step (Translation languages) add more languages to the site. Mark the languages you want to add. Then click on the Next button.
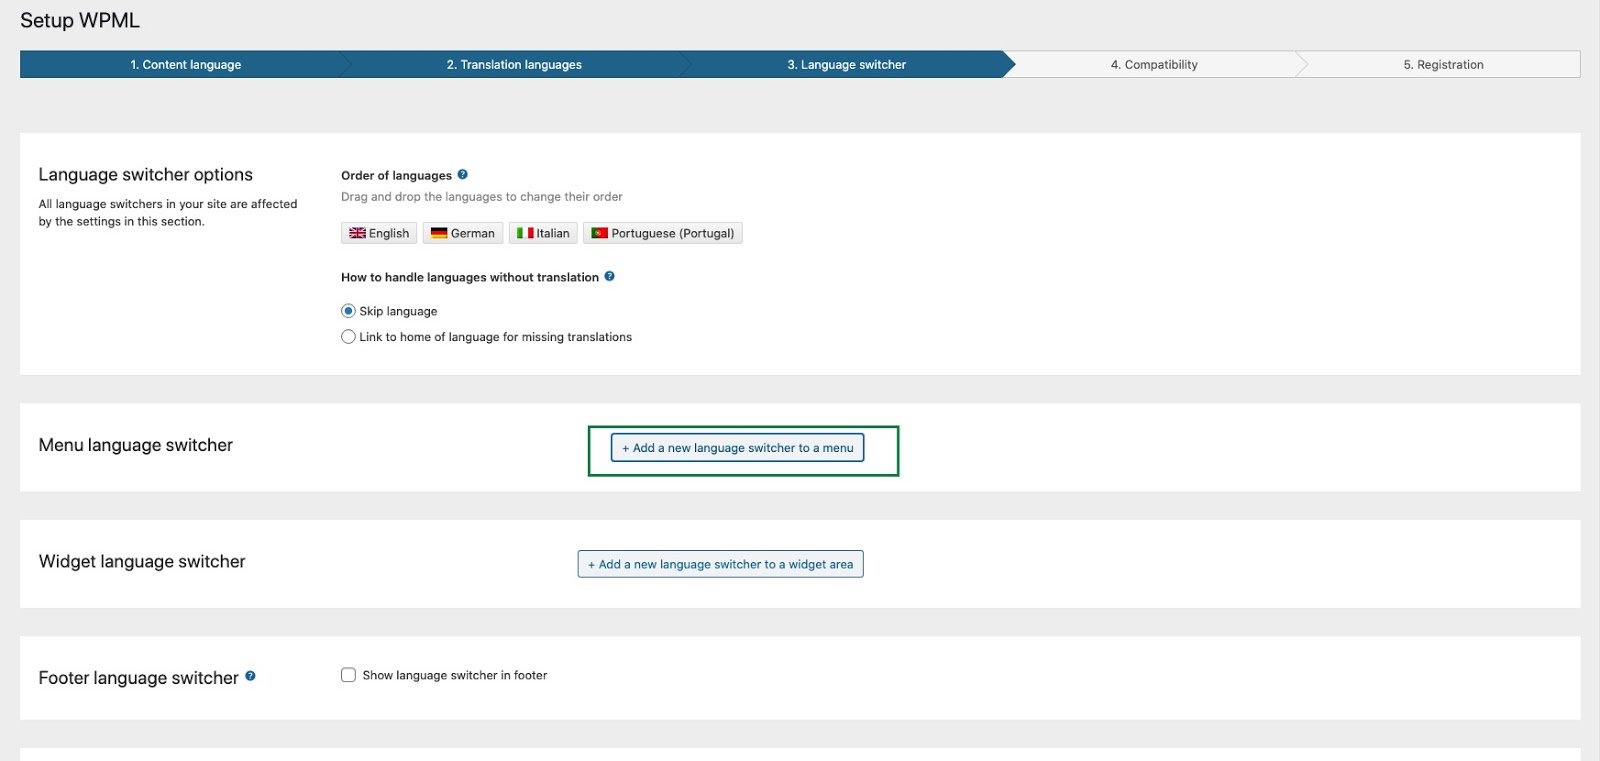
In order to let site visitors select their language, you can add a language switcher to the theme.
WPML’s standard language switchers include a drop-down languages list, a list of languages for the site’s footer, and a language switcher for the menu.
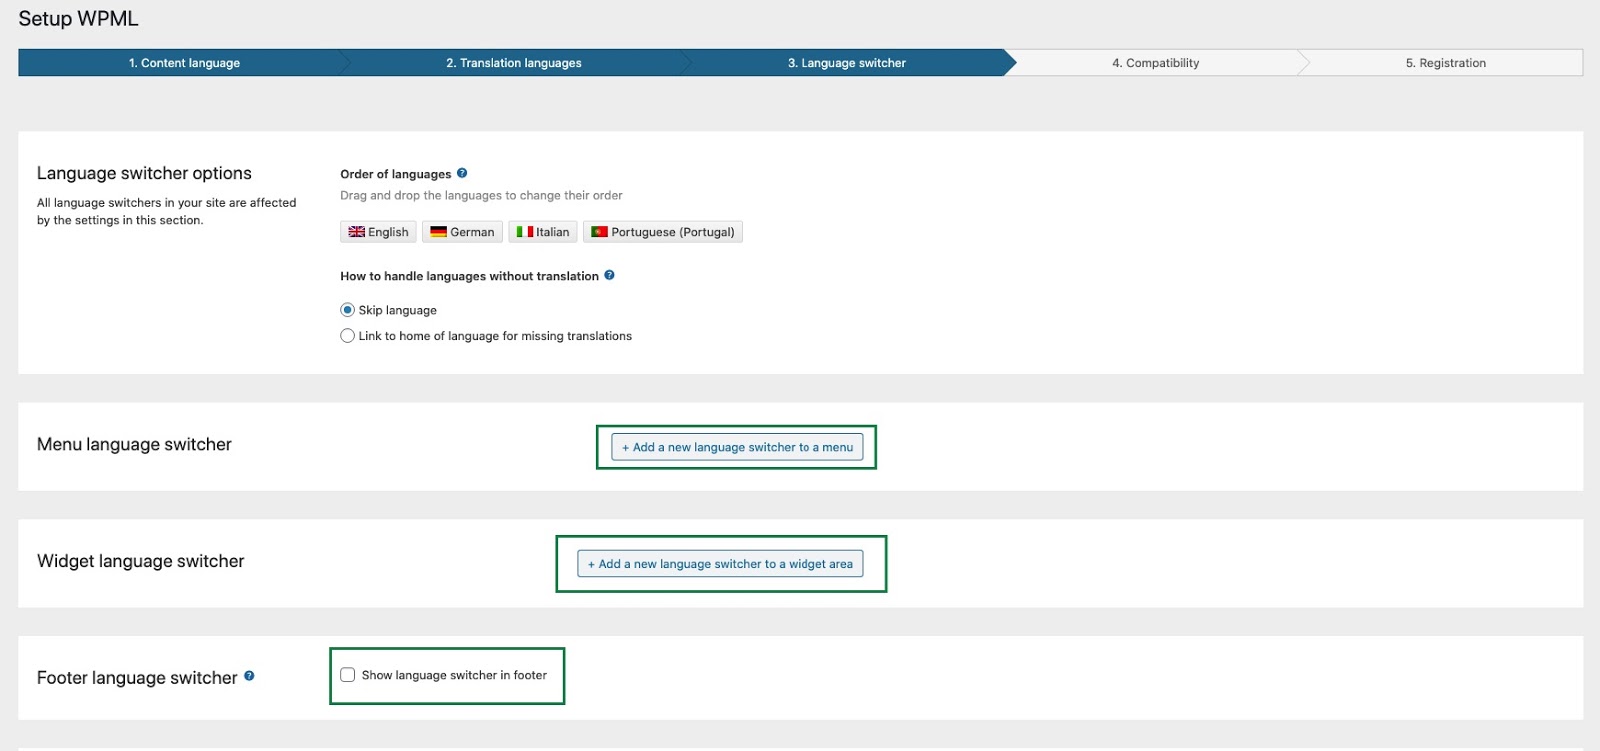
Click the “Add New Language Switcher to Menu” button to add the language switcher to the menu.
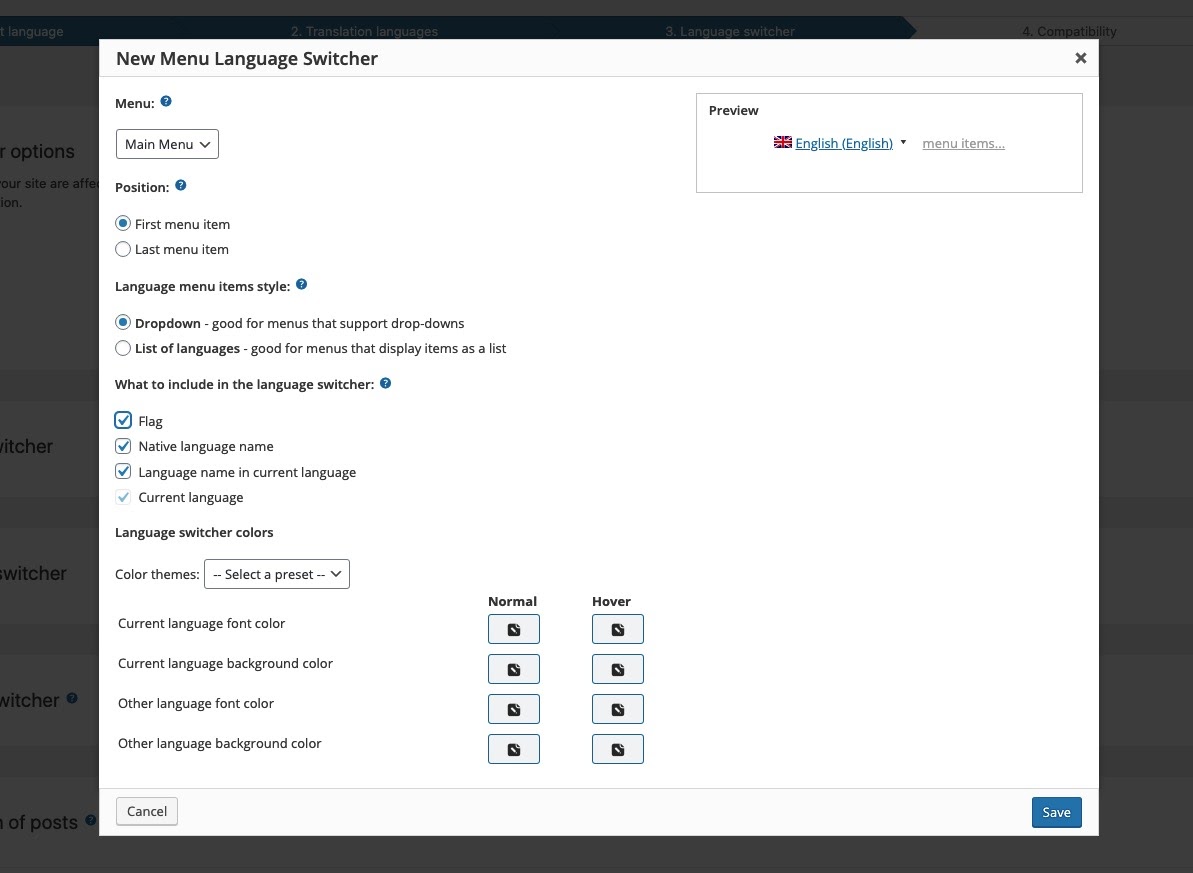
On the screen New Menu Language Switcher, select the position, style of menu items, specify what to add to the language switcher and choose the colors. Then click the “Save” button.
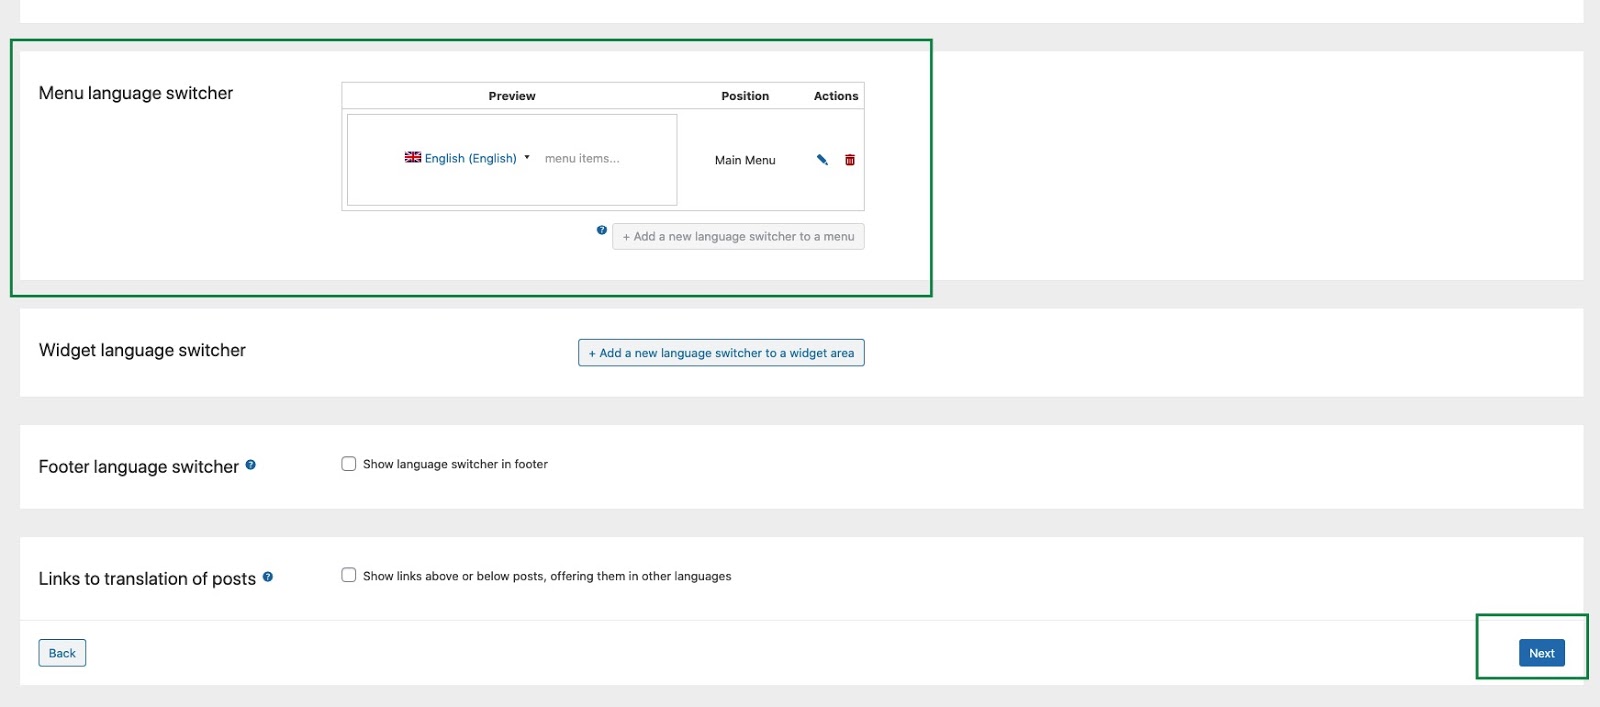
Here you can see a preview of your menu and position and you can manage them at any time. Click on the Next button to proceed to the further step.
Select the first option for the compatibility reporting.

Paste the site key that you can find on your wpml.org account page and click the Register button. if you don’t have a site key, then click the button to generate a key for this site.

WPML String Translation
WPML’s String Translation module is part of the Multilingual CMS account type. To enable it, you first need to download and install it from your WPML.org account, under the Downloads section.
Then, navigate to WPML → String Translation.
For More Information… https://wpml.org/documentation/getting-started-guide/string-translation/.


